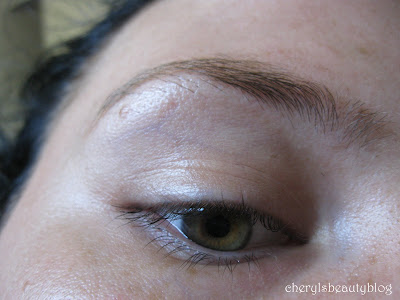
Not gonna lie, I use to be a slacker when it came to keeping my eyebrows in check, but lately I've been keeping up with grooming them. It's not like they grow fast at all so I really don't know why I was so lazy... I have to do it maybe once a month? Is that bad? haha Seriously, they don't grow fast. Another shocker, I've never had my brows professional done before...EVER. My brows are pretty much this shape naturally, with a few stray hairs which I must pluck, and some sparse patches I must fill in. I'm still working on perfecting my technique and I think I'm slowly getting better, but for those of you who have requested for this tutorial...Here you go! Hope you enjoy :D


Tools:
Tweezers
Brow Razor
MAC 266 Angle Brush
MAC Brow Shader in Walnut/Ivory
MAC Carbon Eyeshadow (I mix a little bit of this when my hair is dark, like it is now)
Maybelline Clear Brow Gel
 STEP 2: I then use my Brow Razor and take off any stray hairs between my eyebrows and razor along the tops of my eyebrows (for any stray hairs and to sharpen the edge)
 Look at my hair... haha I didn't do it prior to this tutorial... Oh my.
STEP 4: With an angled brush (I like to use the MAC 266) and an eyeshadow which is a couple shades lighter than your hair colour (for brunettes), make a line at the bottom of your eyebrow. I like using MAC Brow Shader in Walnut and mix it with some Carbon when I have REALLY dark brown, almost black hair like I do now.
 STEP 5: Lightly brush up the eyeshadow line you just made so that the area is even and not to heavy (you don't want your brows to look to harsh at the beginning... sometimes I do it a bit too dark, opps). I also have REALLY sparse hair at this section which I like to fill in, yours might not take as much work as mine does.
 STEP 6: Take more eyeshadow and your angle brush and go over the middle portion and tail/end of your brow.
 STEP 7: Use some clear brow gel and go over your entire brow. I like to go up with the brush and slide it over. It should look something like the picture below when you are finished. The brow gel helps it stay in place ALL day and looks more polished IMO.


